How To Use QBIX Stencils
How to use QBIX Laser cut stencils
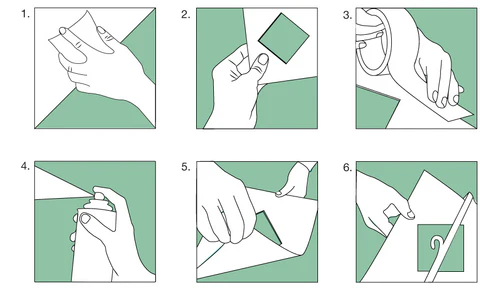
Clean the surface to which you want to apply your stencil.
Position the stencil so that the shape is exactly where you want it and fixate it with masking tape.
Mask the outside of the stencil if needed.
Paint the surface of the stencil.
Gently undo the masking tape and lift the stencil straight up off the surface.
Tip: Make sure your stencil has dried completely, before you put it back in its sleeve.
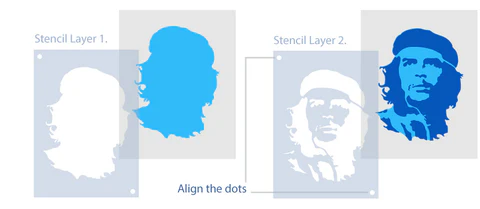
Clean the surface to which you want to apply your stencil.
Use stencil layer 1 to position your 1st layer.
Wait for layer 1 to dry.
Align layer 2 by aligning the dots.
Tip: Use two different shades for contrast and more depth.
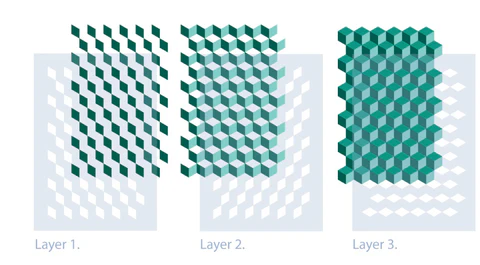
Clean the surface to which you want to apply your stencil.
Use stencil layer 1 to position your 3D pattern as you wish.
Wait for layer 1 to dry. Align layer 2 and 3 with the 1st layer, by filling in the blanks.
Tip: Use three different shades for a maximum 3D effect.

Double layer stencils

QBIX - 3D Stencils

https://www.youtube.com/watch?v=27Y4_QBkKZg&feature=youtu.be
